
Whether you install Windows 11 yourself or purchase it from a computer manufacturer, the sizes of all partitions are allocated. However, the scheduled partition sizes may no longer meet your requirements after running the computer for a period of time. A typical example is that the C drive is running out of space. Many people ask whether it is possible to adjust partition size in Windows 11 without reinstalling the OS and programs. The answer is yes. To resize partitions in a Windows 11 computer, you can use the Windows native tool or free partition software. This article introduces how to resize a Windows 11 partition using both kinds of tools.
How to Change Partition Size in Windows 11 via Disk Management
As in previous Windows 10, Windows 11 has a native Disk Management tool. Besides creating, deleting, and formatting partitions, Disk Management can adjust partition sizes without losing data (in most cases). However, because of many limitations, Disk Management is not the best tool to help resize Windows 11 partitions. Actually, Disk Management can only be used to shrink an NTFS partition to create a new volume or to extend an NTFS partition by deleting the adjacent partition on the right. If you want to extend a volume by shrinking another one, Disk Management cannot help you.
How to resize partitions in Windows 11 via Disk Management:
- Press the Windows + X keys together and then click Disk Management.
- Right-click any NTFS partition and select "Shrink Volume".
- Enter an amount of space and then click the Shrink button. If you do not enter an amount, all available free space will be used by default.
- Transfer all files in the right adjacent partition (such as D:) to another place.
- Right-click this partition and select "Delete Volume".
- Right-click the left adjacent partition (such as C:) and select "Extend Volume".
- Simply follow the pop-up Extend Volume Wizard.
Limitations of Resizing Windows 11 Partitions with Native Tools
First, you should know that Disk Management supports NTFS partitions only. FAT32 and any other types of partitions cannot be resized.
Other limitations include:
- It cannot shrink a partition beyond the point where unmovable files are located.
- It can only shrink a partition leftward and make Unallocated space on the right.
- It can only extend a partition when there is contiguous Unallocated space on the right.
- It cannot move partitions or Unallocated space.
- It cannot resize the System Reserved, EFI, and Recovery partitions.
The major limitation of Disk Management is that it cannot extend a volume by shrinking another one.
How to Resize a Partition in Windows 11 with Free Partition Software
To resize a volume in Windows 11, third-party software is a better choice. NIUBI Partition Editor has a free edition for Windows 11/10/8/7/Vista/XP home computer users. Better than other tools, it has unique 1-Second Rollback, Virtual Mode, Cancel-at-will, and Hot Clone technologies to protect your system and data. Because of its special file-moving algorithm, it is much faster at shrinking, moving, and copying partitions.
Download this tool, and you will see all storage devices with their partition layouts and other information on the right. Right-click any single partition or the leftmost area of a disk, and you will see the available operations; unavailable options are hidden automatically.
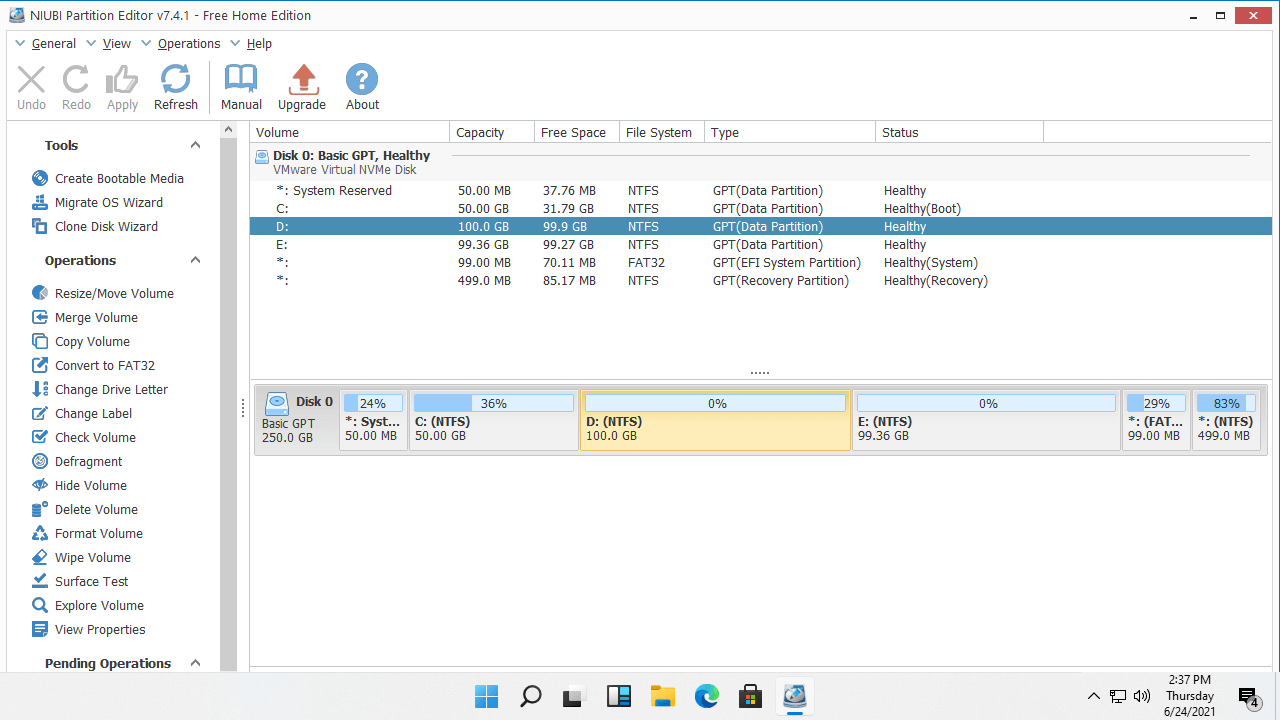
How to resize partitions in a Windows 11 computer with NIUBI Partition Editor:
Right-click any NTFS or FAT32 partition (here it is D:) and select Resize/Move Volume. You have two choices in the pop-up window.
Option 1: Drag the left border rightward, or enter an amount of space in the box for "Unallocated space before".

This partition will be shrunk rightward, and Unallocated space will be created on the left side.
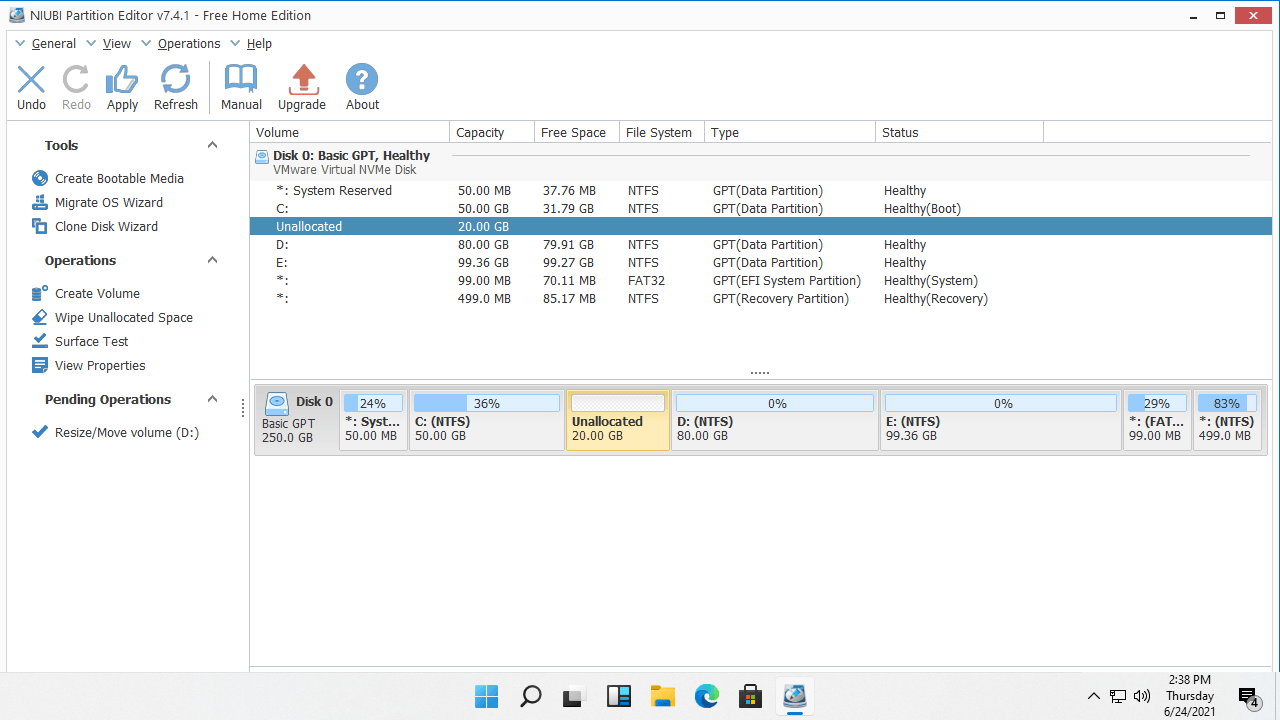
Option 2: Drag the right border leftward, or enter an amount of space in the box for "Unallocated space after".

This partition will be shrunk leftward, and Unallocated space will be created on the right side.
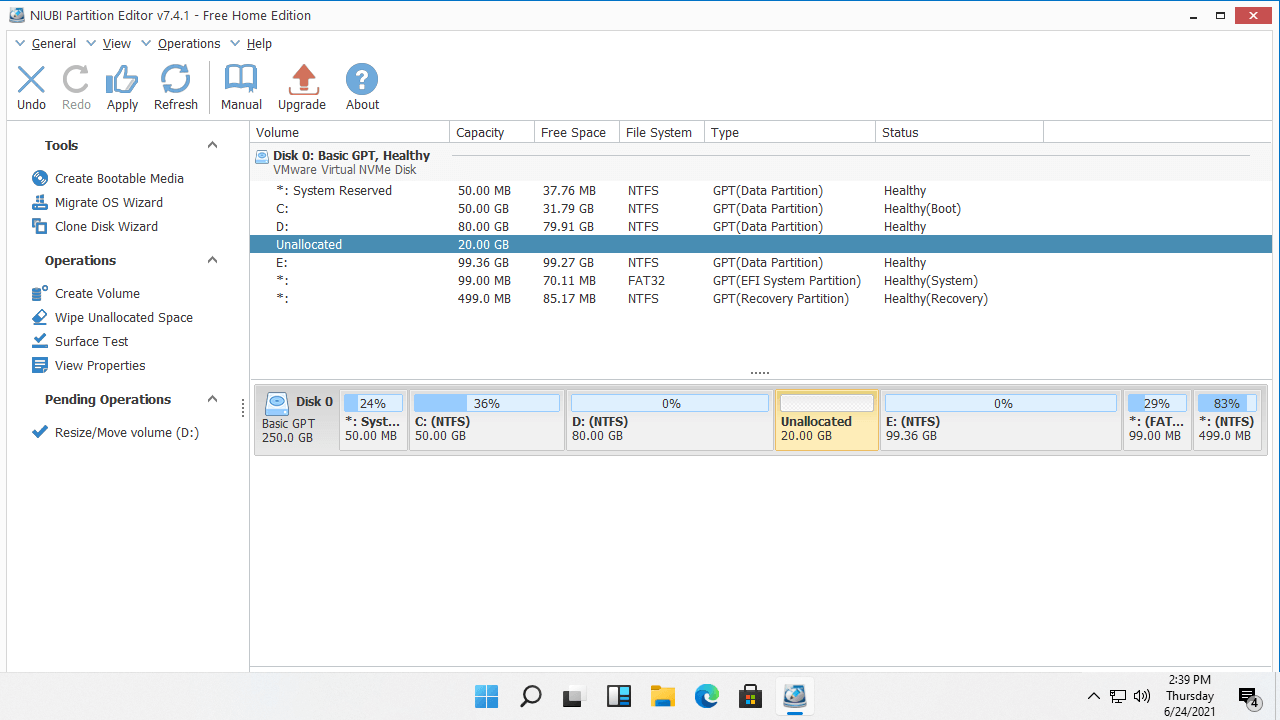
After getting Unallocated space, you can either create new volumes or combine it with other partitions. If you want to extend the C drive partition, follow Option 1 to shrink the D drive and make Unallocated space on the left. If you want to extend the E drive, follow Option 2 to make Unallocated space on the right of the D drive. After that, follow the corresponding method:
To extend the C drive: right-click it and run Resize/Move Volume again, drag the right border rightward in the pop-up window, then the Unallocated space will be combined into the C drive.

To extend the E drive: right-click it and run Resize/Move Volume again, drag the left border leftward in the pop-up window, then the Unallocated space will be combined into the E drive.

If you want to shrink the non-adjacent partition E to extend the C drive, there is an additional step to move partition D.
Watch the video to see how to resize partitions in Windows 11:
Besides resizing partitions in a Windows 11/10/8/7/Vista/XP computer, this free partition manager helps you perform many other disk partition operations, such as moving, merging, converting, defragging, hiding, wiping partitions, scanning for bad sectors, optimizing file systems, and much more.
 © 2009 - NIUBI Technology All Rights Reserved. |