
There are many kinds of partitions in Windows 11/10 computers, such as EFI, Recovery, MSR, System, Boot, and System Reserved. All these small partitions cannot be deleted, resized, or moved by Windows native Disk Management. EFI and Recovery partitions can be created at the front/end or in the middle of a disk. For the operating system, it does not matter where the EFI/Recovery partitions are located. However, you will encounter problems when you extend the C drive or update Windows. To solve these problems, you need to extend the EFI partition or move the Recovery partition in a Windows 11/10 computer. This article explains how to move a Recovery/EFI partition in Windows 11/10 with free partition software.
What Are EFI and Recovery Partitions in Windows 11/10
An EFI (Extensible Firmware Interface) system partition, or ESP, is a partition on a data storage device (usually a traditional mechanical disk or SSD) that is used by computers adhering to the Unified Extensible Firmware Interface (UEFI). When a computer is booted, UEFI firmware loads files stored on the ESP to start installed operating systems and various utilities. An EFI system partition contains several types of files, including:
- The boot loaders or kernel images for all installed operating systems on this computer.
- Device driver files for hardware devices, which are used by the firmware at boot time.
- System utility programs that are intended to be run before an operating system is booted.
- Data files such as error logs.
The Recovery partition in Windows 11/10 is a kind of partition that helps restore the computer to factory settings if there is some kind of system failure. There are 2 types of Recovery partitions in Windows 11/10 computers:
- Windows Recovery partition with a negligible amount of disk space.
- OEM Recovery partition that is set by the computer manufacturer (like Lenovo, Dell, or HP). It occupies a significant amount of disk space because it contains the manufacturer settings for application drivers and other things that allow you to restore these default settings.
Windows 11/10 Cannot Move EFI/Recovery Partitions
In Windows 11/10 native Disk Management, there is no file system shown for the EFI partition, and all useful operations are grayed out. For the Recovery partition, there is no drive letter or file system shown; there is only a Help option in Disk Management.
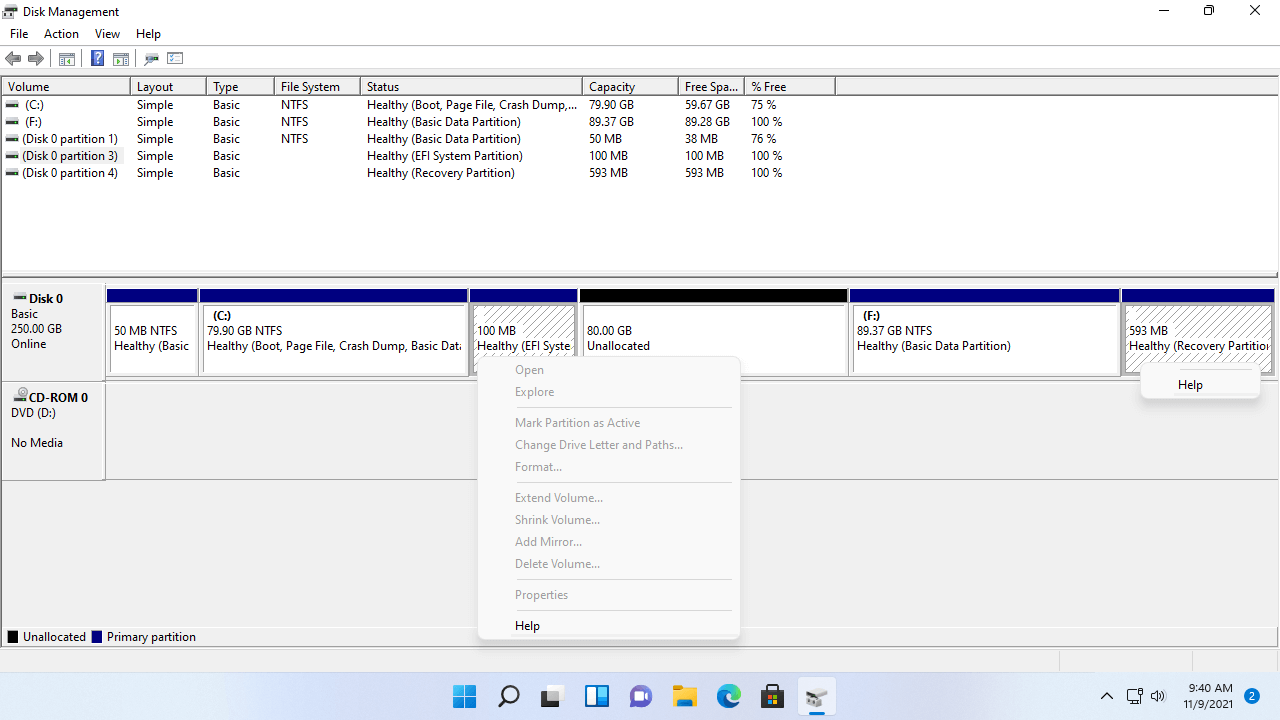
In fact, Disk Management cannot move even a normal data partition, because it cannot change the start position of a volume.
To move an EFI/Recovery partition in a Windows 11/10 computer, you must run third-party software such as NIUBI Partition Editor. Compared to other tools, it features Virtual Mode, Cancel-at-will, 1-Second Rollback, and Hot Clone technologies to protect your system and data. In addition, because of its advanced file-moving algorithm, it is 30% to 300% faster.
How to Move an EFI/Recovery Partition in Windows 11/10
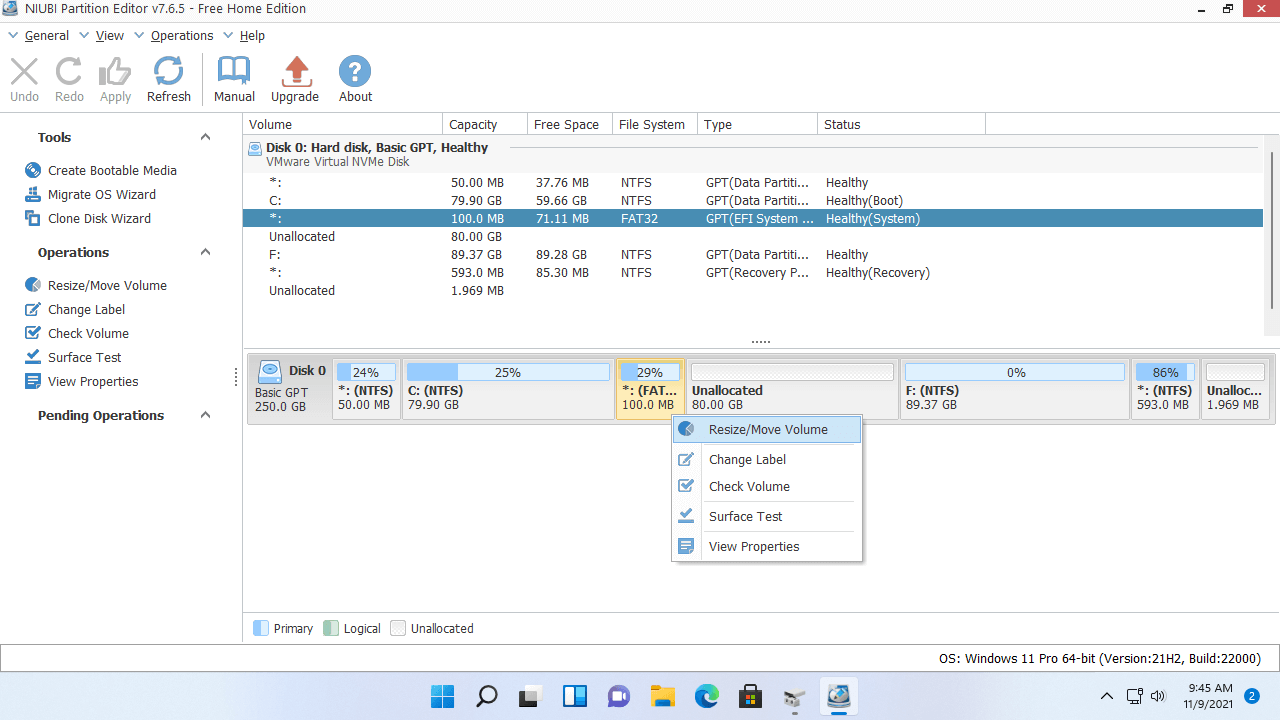
Download this tool, and you will see all storage devices with their partition layouts and other information on the main window. To move a Recovery/EFI partition in Windows 11/10, you just need to click, drag, and drop on the disk map.
In many computers, there is a Recovery or EFI partition between the C and D drives. In that case, Disk Management cannot extend the C drive whether you shrink or delete the D drive, because the Unallocated space is always non-adjacent to the C drive. To solve this problem, you need to move the Recovery/EFI partition to the right. When there is adjacent Unallocated space, the C drive can be extended easily.
How to move a Recovery/EFI partition in Windows 11/10 with NIUBI:
- Right-click the EFI/Recovery partition and select "Resize/Move Volume" in NIUBI Partition Editor.
![NIUBI Partition Editor]()
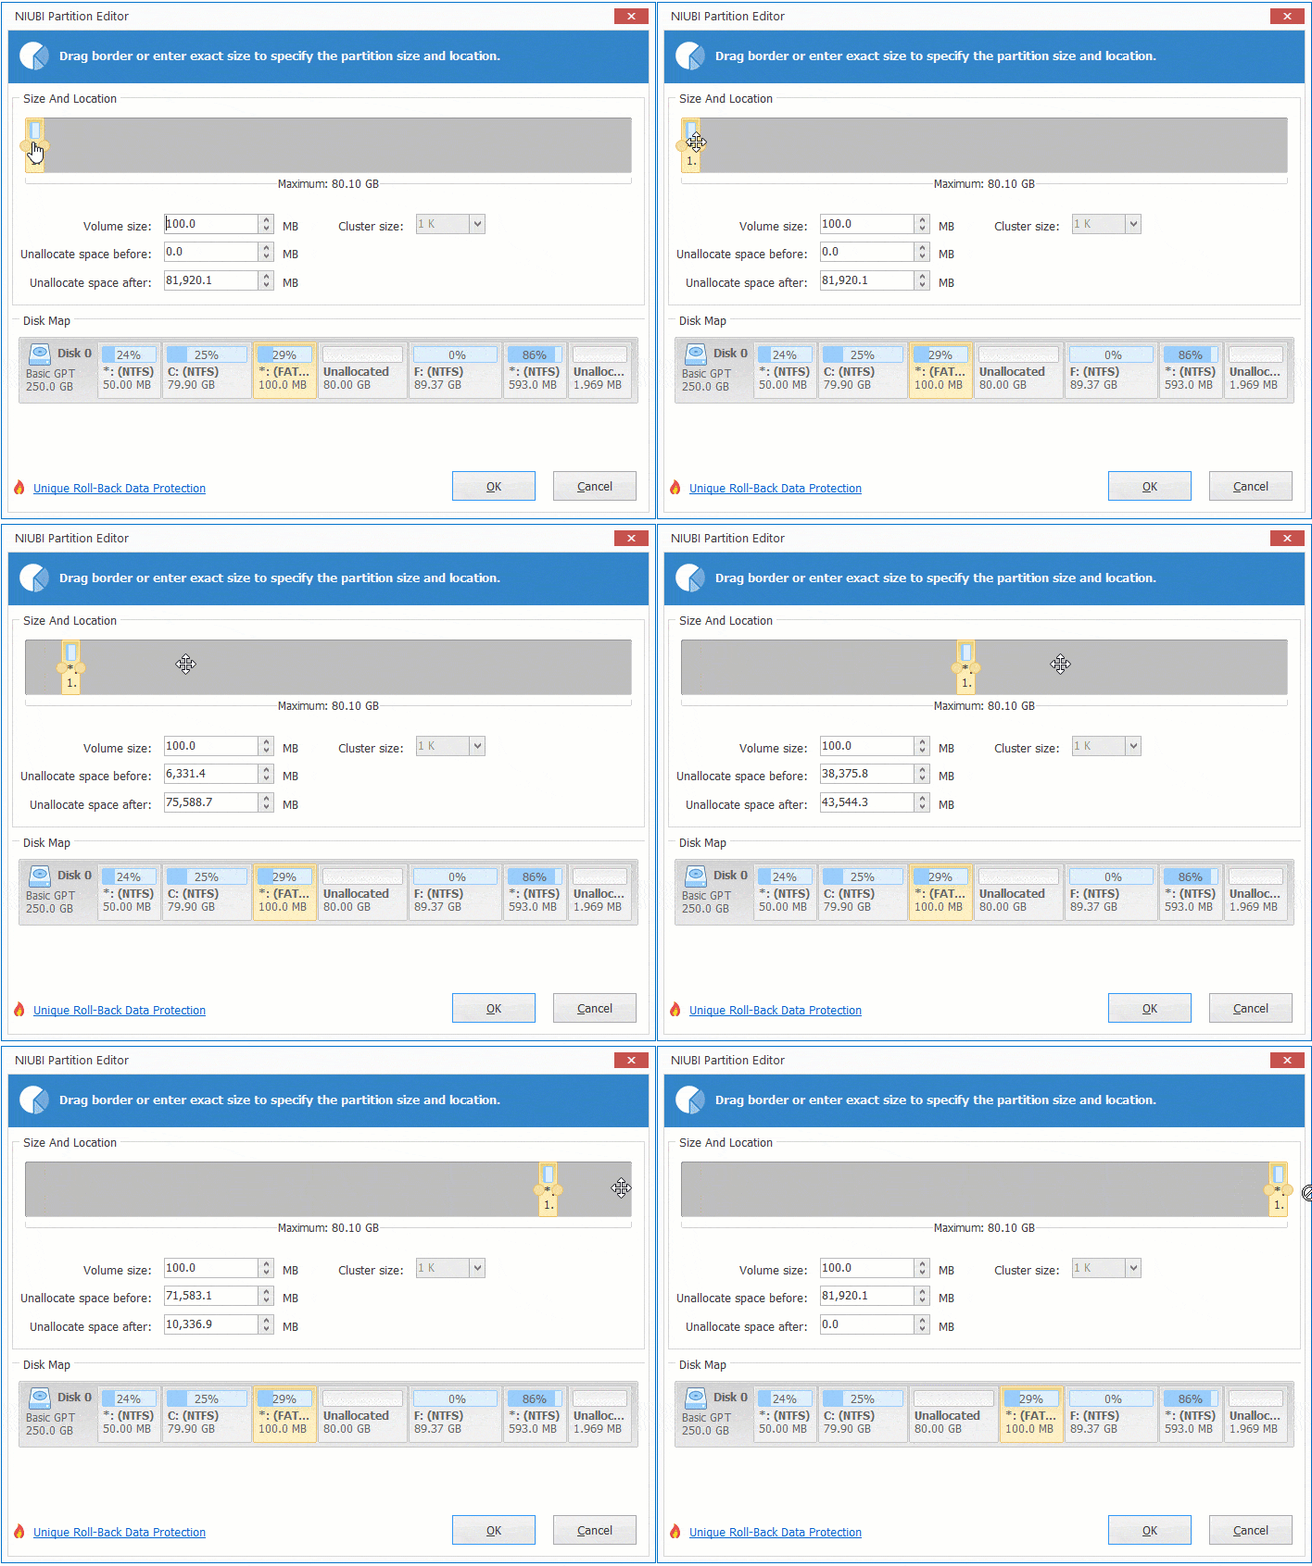
- Put the mouse pointer in the middle of the EFI/Recovery partition and drag it rightward (or leftward depending on your layout) in the pop-up window.
![Move EFI]()
- Click OK to go back to the main window, then click Apply on the top left to take effect.
![EFI partition moved]()
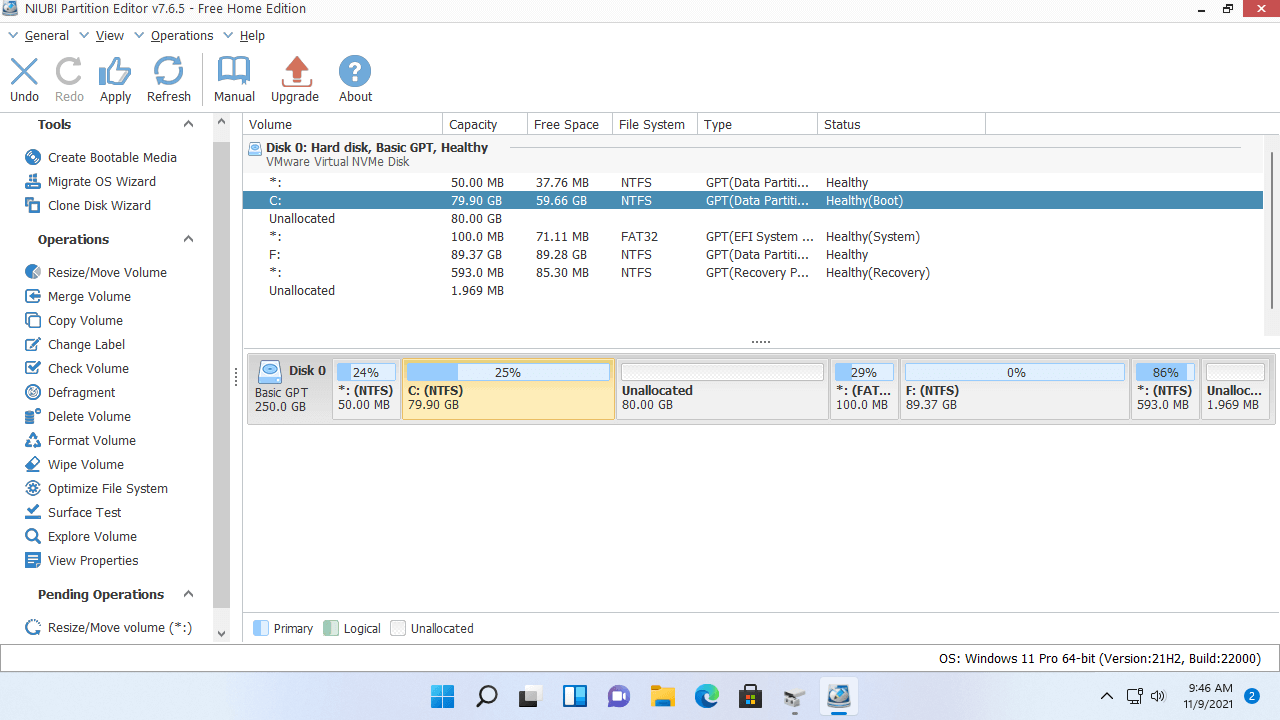
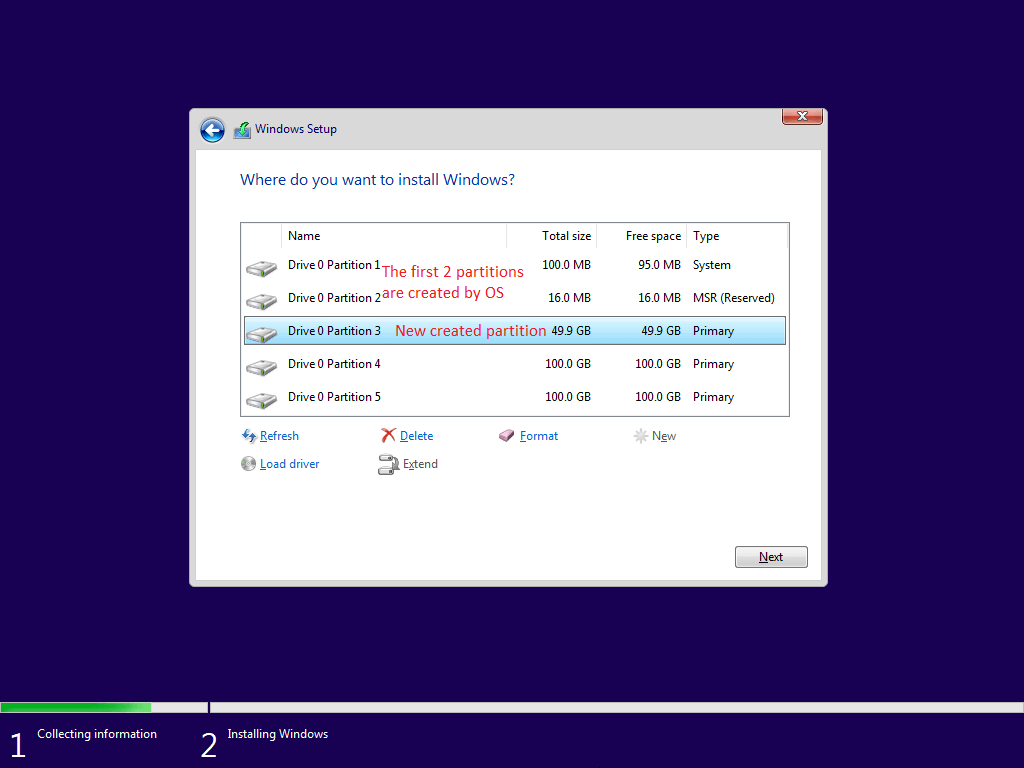
When installing Windows 11/10, if there are several partitions and you select the first one to install, the EFI and an MSR partition are created at the front of this disk. The Recovery partition is created behind the C: drive by default. The MSR (Microsoft System Reserved) partition is not shown in Disk Management; it can be deleted safely by NIUBI Partition Editor.
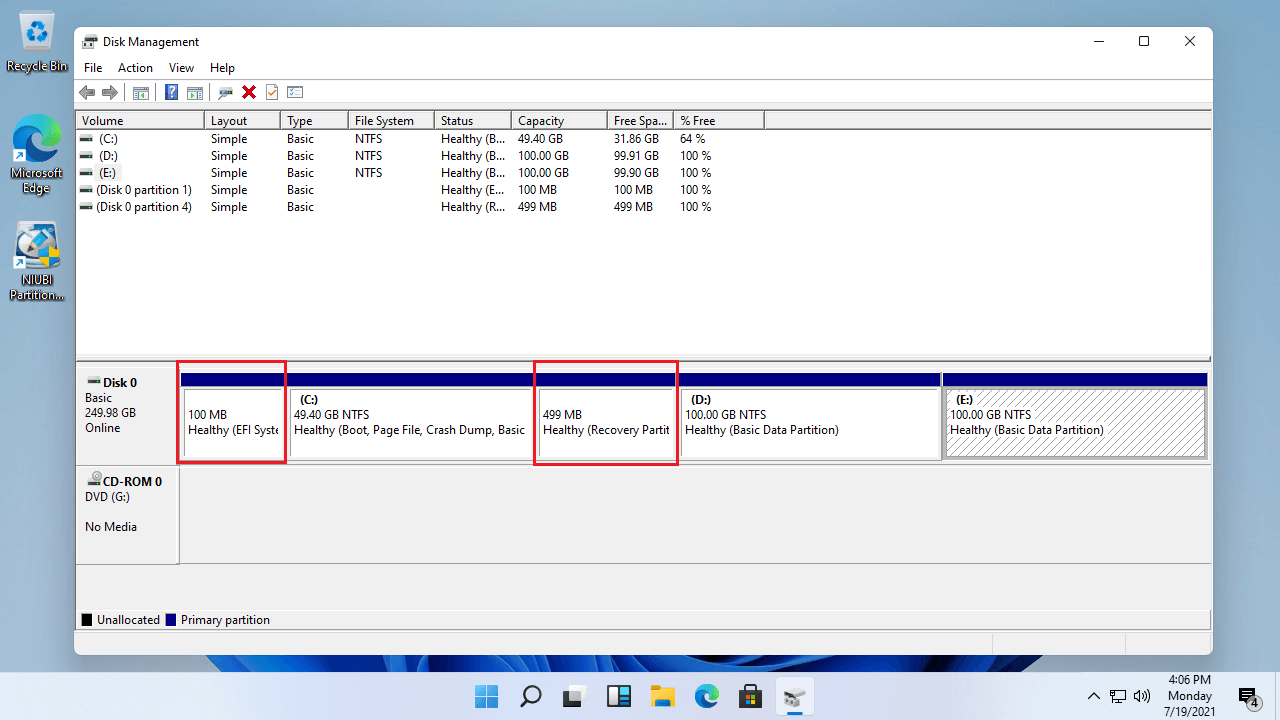
As shown in the screenshot above, if you want to extend the C drive but there is a Recovery partition in the middle of the C and D drives, you must move the Recovery partition in Windows 11/10 to the right with NIUBI Partition Editor. If you have shrunk the D drive with Disk Management, Unallocated space was created on the right of the D drive. Before extending the C drive, you should move the D drive and the Recovery partition to the right one by one.
EFI and Recovery partitions could be created at the front/end or in the middle of a disk. When you move an EFI or Recovery partition in a Windows 11/10 computer, remember to put the mouse pointer in the middle of this partition and drag it to the other side. Then you can exchange its position with the adjacent Unallocated space.
Besides moving partitions, NIUBI Partition Editor helps you perform many other disk partition management operations, such as shrinking, extending, merging, copying, converting, and wiping. It provides a free edition for Windows 11/10/8/7/Vista/XP home users, which is fully functional and 100% clean without any bundled plugins.
 © 2009 - NIUBI Technology All Rights Reserved. |